Welcome to Bright Innovations


If you’re using DreamHost as your web hosting user and you want to set up email services through Zoho, you’ll need to configure your MX records. MX records are responsible for directing incoming emails to the correct mail server.
Here’s a step-by-step guide on how to configure Zoho MX records in DreamHost:
1. Log in to your DreamHost account:
– Go to the DreamHost website and click on the “Login” button at the top right corner.
– Enter your email address and password, then click “Login.”
2. Access the DNS settings:
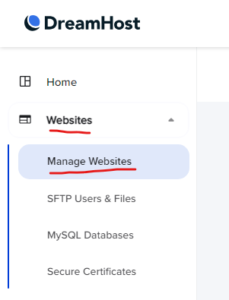
– Once logged in, click on the “Domains” tab in the navigation menu.
– Select the domain for which you want to configure the MX records.
3. Edit the DNS records:
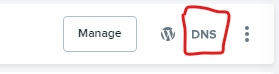
– Scroll down to the “DNS” section and click on the “Manage DNS” button.
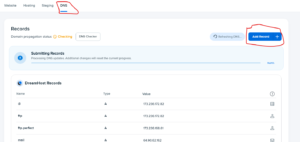
– Look for the “Add a custom DNS record to” section and select “MX” from the dropdown menu.
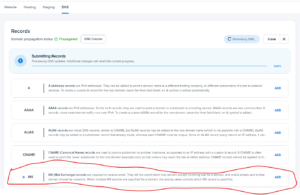

4. Configure the MX records:
– In the “Name” field, enter the domain name provided by Zoho (e.g., mx.zoho.com).
– In the “Value” field, enter the MX record value provided by Zoho (e.g., mx.zoho.com).
– Set the “Priority” to the desired value (e.g., 10).
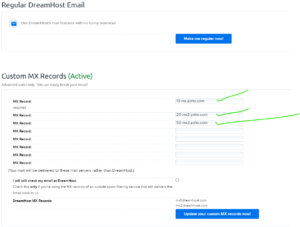
Zoho MX Record Entry For Dream host
10 mx.zoho.com
20 mx2.zoho.com
50 mx3.zoho.com
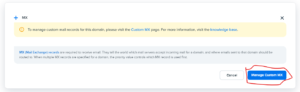
– Click on the “Change this domain to use custom MX records now!!” button to save the changes.
5. Verify the MX records:
– After adding the MX records, it’s important to verify them to ensure they are set up correctly.
– Go back to the Zoho email setup page and click on the “Verify MX Records” button.
– Zoho will check if the MX records are correctly configured and display a success message if everything is in order.

6. Wait for DNS propagation:
– DNS changes may take some time to propagate across the internet.
– It typically takes a few hours, but in some cases, it can take up to 48 hours for the changes to take effect.
That’s it! You have successfully configured Zoho MX records in DreamHost. Now, all incoming emails for your domain will be directed to Zoho’s mail servers.
Remember, if you’re using any other email services or have existing MX records, make sure to remove or update them accordingly to avoid any conflicts. It’s always a good idea to double-check your settings and test your email after making any changes.
If you encounter any issues or have any questions, don’t hesitate to reach out to DreamHost’s support team or consult Zoho’s documentation for further assistance.
Setting up email services can be a bit technical, but with these step-by-step instructions, you should be able to configure Zoho MX records in DreamHost smoothly. Enjoy the benefits of Zoho’s robust email platform for your domain!
for any supports please send email to info@brightdxb.com or call 04 27 30 845